Connecting AWS Chime SIP Lines
AWS Settings
This portion of the guide will show how to create an AWS Chime Voice Connector and purchase phone lines for use with VCOM Virtual Matrix.

From the AWS Management Console navigate to the Business Applications section and select Amazon Chime.
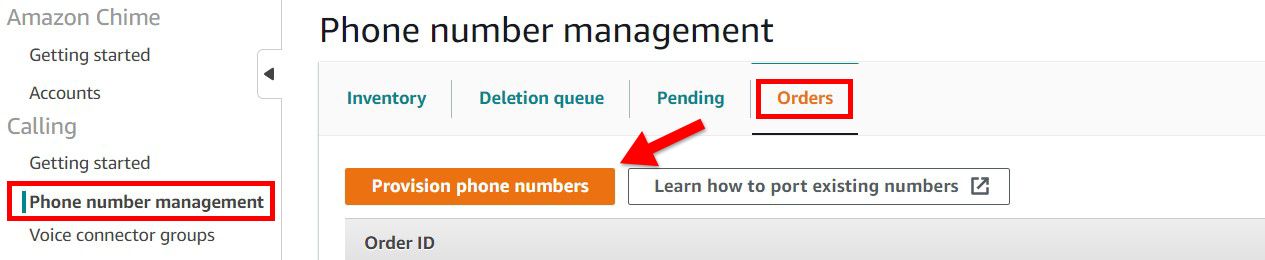
On the left select Phone number management, select the Orders tab and then click Provision phone numbers.
Select Voice Connector and then click Next. Follow the prompts to purchase a phone number.
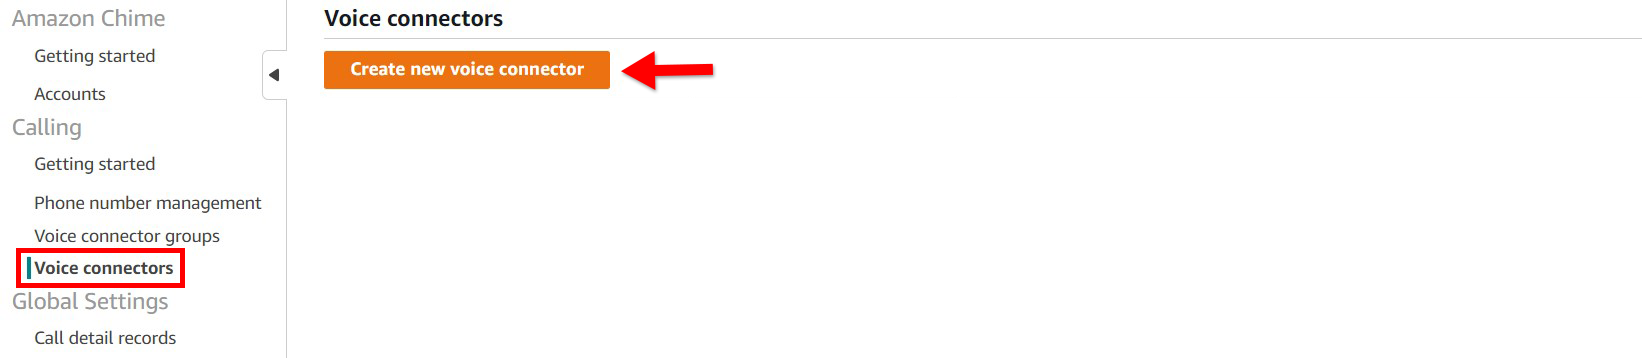
On the left select Voice connectors and then click Create new voice connector.
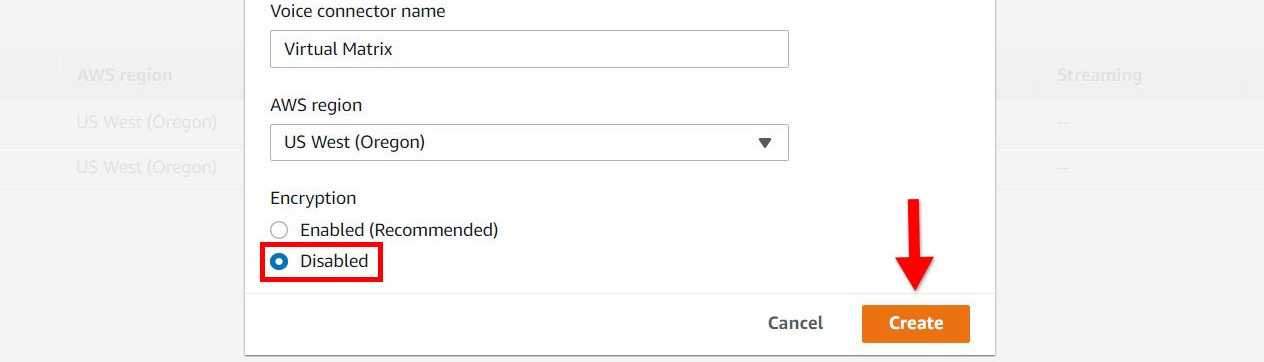
Enter a name for your Voice Connector and Disable Encryption then click Create.
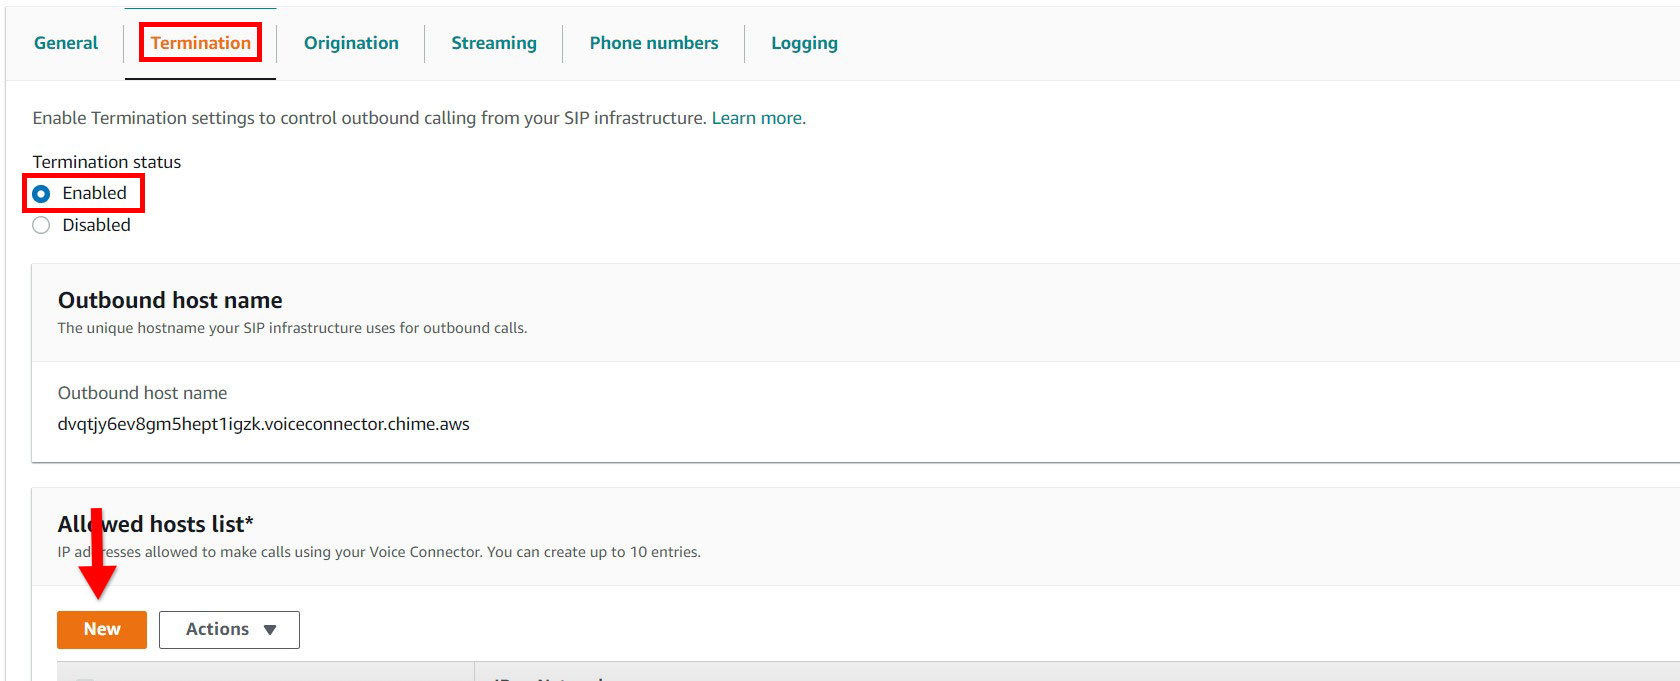
Select your new Voice Connector and navigate to the Termination tab. Set Termination status to enabled and then click New in the Allowed hosts list section.
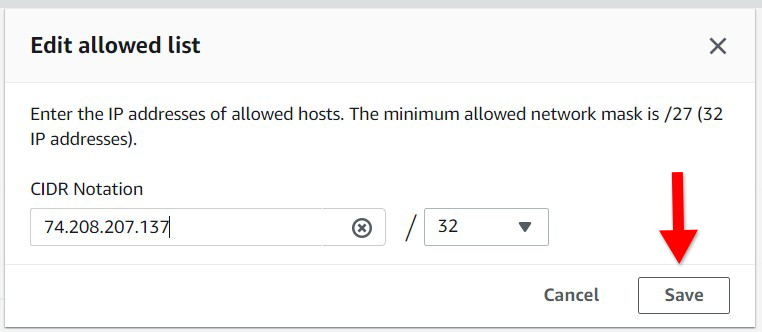
Enter the IP address of your VCOM Virtual Matrix server and then click Save. Scroll down to the bottom of the Termination page and click Save.
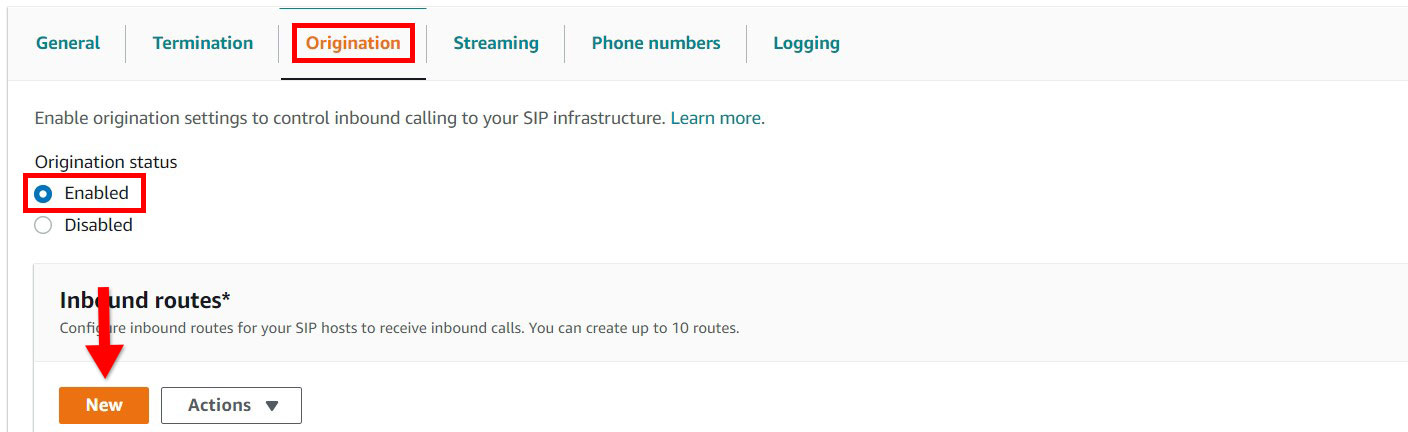
Navigate to the Origination page and under Origination status select Enabled. Click New under the Inbound routes section.
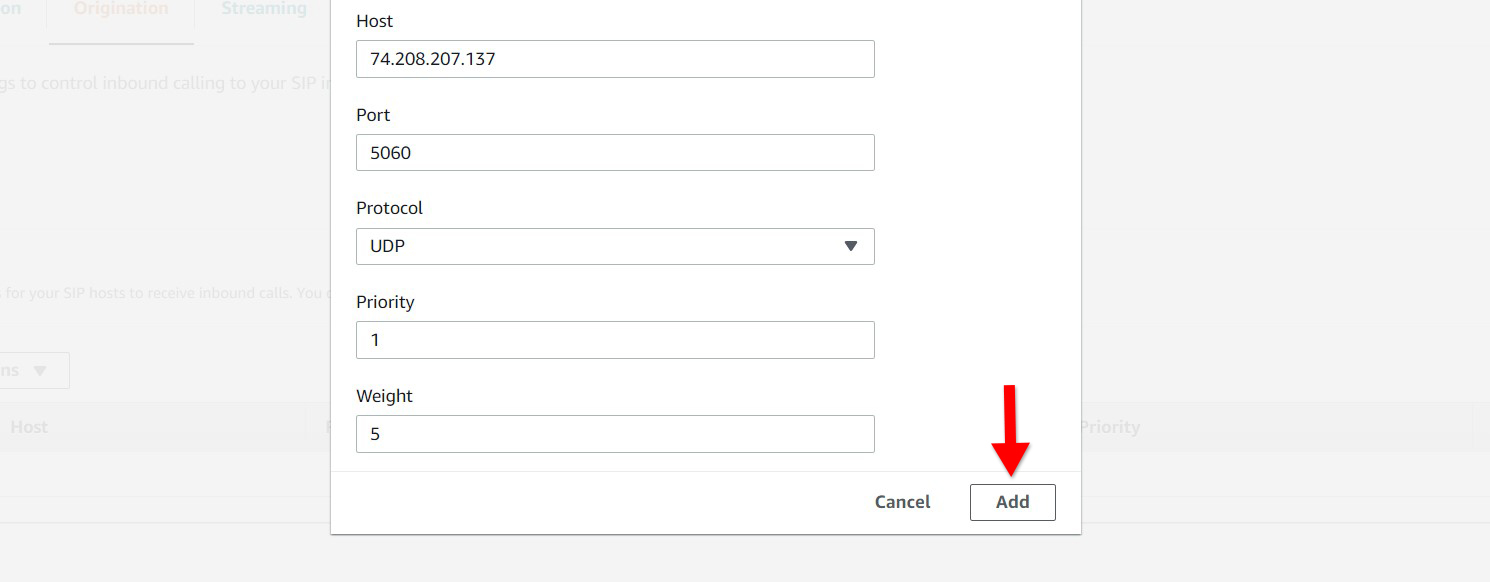
In the Host section enter the IP address of your VCOM Virtual Matrix server then fill out the remaining fields as shown then click Add. Scroll down to the bottom of the page and click Save.

Navigate to the Phone numbers section and then click Assign from inventory. Select your desired phone number and then click Assign from inventory to add the line to the Voice Connector.
VCOM Settings

Access the System Administration application either by clicking on the desktop shortcut or by entering the IP address of the VCOM server in your browser’s address bar. From the System Configuration tab select Client Configuration then click Add.
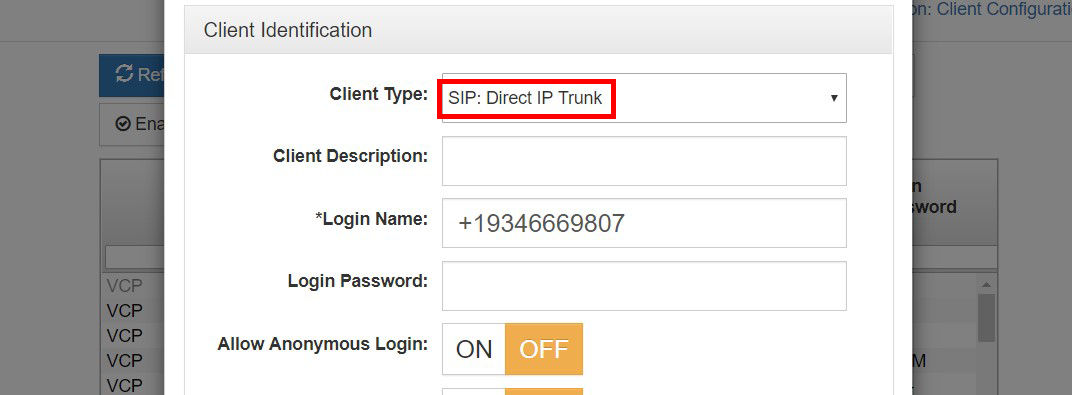
For the Client Type select SIP: Direct IP Trunk and enter the Login Name in the format shown above. Add a Selector Talk/Listen name and then click Save.

Highlight the client you just created and then select Options from the menu.

In the SIP Target Primary Host Name field enter your Voice Connector ID in the format your-voice-connector-id.voiceconnector.chime.aws.
Note: When making an outbound call from VCOM you will need to precede the phone number with +1.
To use Direct IP Trunks such as AWS Chime SIP lines it is necessary to disable SIP Server Domain Authentication in the System Settings.