Installation
Hardware Requirements
Operating System Requirements
The VCOM Virtual Matrix can be installed on virtually any modern Windows based
operating system however Windows 11 Professional or Windows Server 2022 are highly recommended.
Memory Requirements
The memory requirement for the VCOM Virtual Matrix are very minimal and system size does
not realistically need to be considered. It is recommended to use 8GB of memory
with any modern OS which will also provide sufficient resources for operation of the
Virtual Matrix.
Storage Requirements
The storage requirements for VCOM Virtual Matrix in the standard configuration are not
substantial but some incremental storage space is required for Activity/Debug Logs.
In the standard configuration, a minimum of a 128GB SSD is recommended although
a 256GB SSD is preferred. An SSD is specified only for reliability.
If the system is configured with audio recording, additional diskspace may be required. Recording in WAV file format, at the default audio sampling rate of 32KHz, would require 225 MB per recording hour but after MP3 compression will likely be 10% of that value. As an example, if recording 1 channel with active audio for 5 hours per day for an entire year, it would require and estimated 40GB of disk space. When the system is configured with audio recording, a TB drive is recommended.
Computational Requirements
The computational requirements for the Virtual Matrix depends on the number of
active connections to the system and how the system is being utilized.
Network Requirements
Network Diagram

Bandwidth Requirements
The network bandwidth requirements must be carefully analyzed to ensure proper
bandwidth is available at any point where multiple clients will share the same physical
connection point. The most obvious connection point where this is critical is at the
server where bandwidth requirements will be the sum of the requirements of every
possible client. The least obvious connection point where this is also important occurs
when multiple remote clients in one physical location need to access the server in
another physical location as the bandwidth requirements for the connection between
these two points will be the sum of the requirements for all remote clients.
To determine the bandwidth requirements it is necessary first to determine the network bandwidth utilization per client connection, which is indicated below for the various audio sample rates that can be configured.
VCOM Control Panel and VCOM Device Interface:
| Audio Sample Rate | Data Rate (Kbps) [ATS=20ms*] | Data Rate (Kbps) [ATS=40ms*] | Data Rate (Kbps) [ATS=60ms*] | Data Rate (Kbps) [ATS=80ms*] | Data Rate (Kbps) [ATS=100ms*] |
|---|---|---|---|---|---|
| 8 KHz | 32 | 23.6 | 20.8 | 19.4 | 18.56 |
| 16 KHz | 44.8 | 36.4 | 33.6 | 32.2 | 31.36 |
| 32 KHz | 46.8 | 38.4 | 35.6 | 34.2 | 33.36 |
VCOM WebRTC Control Panel:
| Audio Sample Rate | Data Rate (Kbps) |
|---|---|
| 48 KHz | 200 |
ATS = Audio Time Slice per packet which controls how many 20ms audio frames are transmitted within a single UDP packet. As each UDP packet requires a fixed amount of overhead, the more frames sent at the same time, the less the UDP overhead which conserves network bandwidth. Conversely, the more audio frames sent per transmission, the greater the system latency and the potential audible consequence of a lost packet. The default is 20ms.
To determine server bandwidth requirements, first determine maximum potential bandwidth utilization by multiplying the number of clients (users and devices interfaced) by the Data Rate associated with appropriate Audio Sample Rate for the configured Audio Time Slice per packet. The product is the bandwidth required if every client were to receive audio simultaneously (maximum download bandwidth requirement) and also the bandwidth required if every client were to send audio simultaneously (maximum upload bandwidth requirement). In a typical system, the maximum download bandwidth requirement must be allocated for, as several system functions can require simultaneous audio transmission to all clients. The maximum upload bandwidth requirement however will realistically never be achieved as it is not feasible that all audio sources in a system would be active simultaneously since the result would be inaudible. As such the upload bandwidth to be allocated must be made based on the estimation of the number of simultaneous active audio sources noting that inactive audio sources will have no bandwidth requirements.
Firewall Requirements
VCOM uses the below ports. It is only necessary to open the ports for the VCOM features you use in the "Required for" column below. In VCOM version 6.5 and later the
Windows firewall rules are automatically created upon installation. The WebRTC Media audio uses the ephemeral port range which should not need to be opened on the firewall.
| Port or Port Range | Protocol | Description | Required for |
|---|---|---|---|
| 80 | TCP (HTTP) | System Administration and WebRTC Control Panel data (Unsecure) | Not Required |
| 443 | TCP (HTTPS) | System Administration and WebRTC Control Panel data (Secure) | System Administration and WebRTC Control Panel |
| 81 | TCP (WS) | WebRTC Control Panel Signaling data (Unsecure) | Not Required |
| 444 | TCP (WSS) | WebRTC Control Panel Signaling data (Secure) | WebRTC Control Panel |
| 1000 | TCP (IOIP) | Control Panel for Windows/iOS/Android & Device Interface data | Control Panel |
| 1000 | UDP (IOIP) | Control Panel for Windows/iOS/Android & Device Interface audio | Control Panel |
| 1001 | TCP (IOIP) | Virtual Matrix Failover data | Failover |
| 5060 | TCP (SIP) | SIP Signaling data | SIP |
| 5060 | UDP (SIP) | SIP Signaling data (Default but can be disabled to force TCP) | SIP |
| 16384-32768 | UDP (RTP+RTCP) | SIP Media audio | SIP |
| 49152 to 65535 | UDP (WebRTC) | WebRTC Media audio | WebRTC Control Panel |
| 8443 | TCP (WSS) | Video Application Server | Video Streaming |
| 8888 | TCP/UDP | (separate) Media Server | Video Streaming |
WebRTC Audio Connection
When the client logs into the server, the client and the server work together determine the network path for the audio connection. If the client and server are both located on the same private network, the audio connection is straight forward and a connection is made directly between the client and server. If the server is located on a private network and the client is on the public Internet or the client is on separate private network that is also connected to the public internet, the audio connection is more complex as the connection must be established via the firewall(s) of the private network(s). In 80% of network installations, this is all handled automatically and transparently such that the audio connection is routed directly to and through the firewall(s) of the private network(s) without further considerations necessary. However, in 20% of the network installations, typically on highly secure corporate networks using Symmetric NATs, the firewall restrictions are such that the audio connection cannot be routed directly to and through the firewall of the private network. In this situation, the audio connection must be routed through a relay server located in the public Internet. This relay server is referred to as a “TURN” server which stands for ‘Traversal Using Relays around NAT’. If a TURN server is required, please refer to the ‘TURN Server’ section for setup and configuration information. If provisioning a TURN server is not feasible, a TURN server can be provided as a service by Intracom. Using a TURN server is completely secure as all WebRTC audio packets must be encrypted using TLS (Transport Layer Security) by definition and can only be decrypted by the intended recipient.
Software Installation
Download VCOM Virtual Matrix from our downloads page and unzip the installer.
Run the installer and follow the prompts. You will need to accept Intracom Systems’ License Agreement to install the software. During the installation process you will be asked if you want to install the VCOM Virtual Matrix to run as a service or application. Servers should run VCOM as a service.
To open the VCOM Virtual Matrix once installed click on your ‘VCOM Virtual Matrix’ shortcut icon on your desktop or click on your start menu and select ‘All Programs.’ Find ‘Intracom’ and select ‘VCOM Virtual Matrix.’
Note, you can run the VCOM Virtual Matrix before licensing but will not be able to connect Control Panels or Device Interfaces.
Licensing
To license your VCOM System you need to acquire a valid license file from Intracom. To do so you must provide Intracom with your unique ‘System Identification Code’ generated automatically when you install the VCOM Virtual Matrix. The ‘System Identification Code’ is a unique value specific to the computer on which the Virtual Matrix was installed and is not transferable to any other computer. If the server you are running the VCOM Virtual Matrix on has dual network cards make sure the correct one is chosen before sending the system identification code as it is dependent on the network card being used.
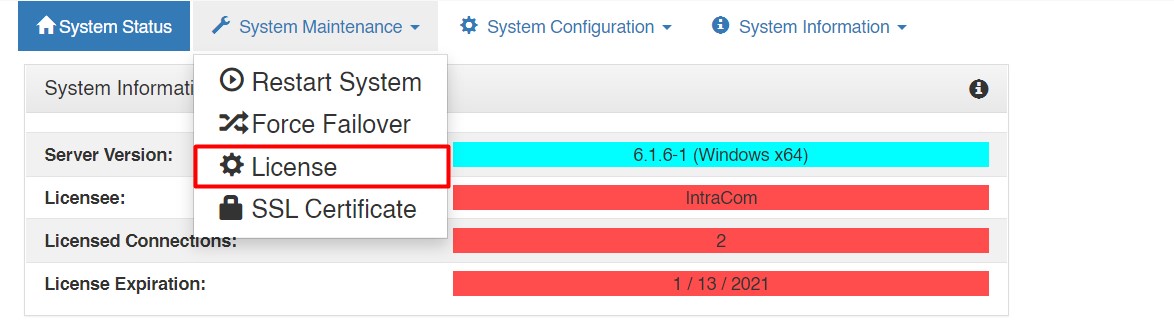
1) Log into the VCOM System Administration and in the upper left corner select 'License' from the 'System Maintenance' tab.
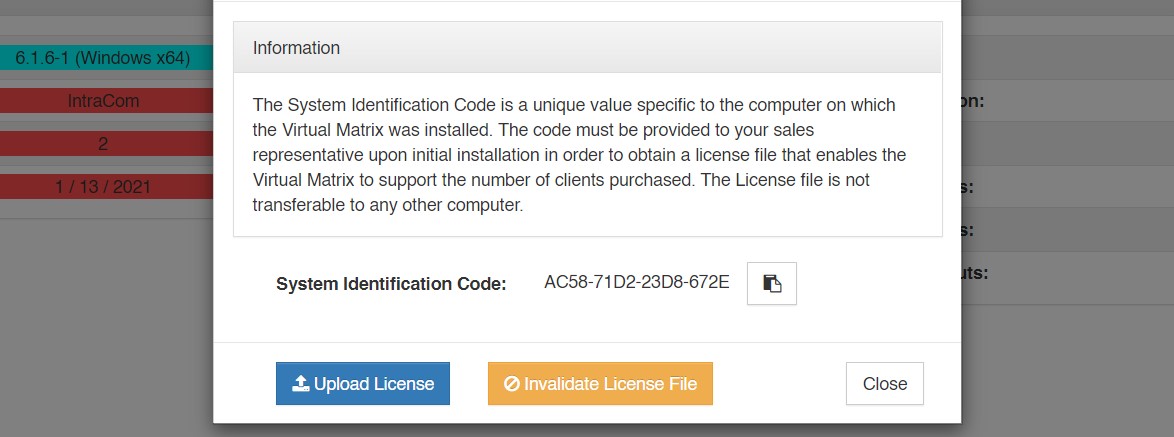
2) If you do not have a VCOM license copy the code and send it to your VCOM sales representative. If you already have a VCOM license click 'Upload License' and select the license file.
Once the license file is installed, the VCOM Virtual Matrix will be ready to accept connections under the default configuration for 40 users consisting of 20 guest users that work using the guest template, 10 VCPs set for Windows Desktop, and 10 VDIs set for 4 wire interfaces.
The guest template allows for users to use their own user name for logging into the VCP on any supported device using the password of “guest”. This is useful during temporary/demonstration in which you can assign the necessary selectors for the event, give the users the Virtual Matrix IP address, and the users can use their own user name with the password of “guest”.
The 10 preprogrammed “Panels” all have the user name of “panelxx”, where xx= the associated number of the panel 01-10. For example, Panel #1 would use “panel01” as the user name. All panels do not have a password; so leave this blank when signing into the Virtual Matrix from the VCP.
The 10 preprogrammed “VDIs” are setup for a 4-wire interface. Like the aforementioned panels, the VDIs use “ioxx”, where xx= the associated number of the VDI 01-10. The VDIs also do not have a password, so leave this blank when signing into the Virtual Matrix from the VDI.
SSL Introduction
SSL allows for a secure, encrypted connection to be established between the VCOM Virtual Matrix server and the VCOM WebRTC Control Panel as well as the VCOM System Administration. The VCOM Virtual Matrix server will automatically generate a self-signed SSL certificate upon first launch.
By default, browsers do not trust self-signed certificates. As such when you try to access the System Administration or WebRTC Control Panel through a browser you will likely see a warning message or be blocked entirely. Despite the warning message, your connection to VCOM is still secure and encrypted. To avoid this warning message it is recommended to install the System Administration and WebRTC Control Panel apps. Additionally, the self-signed certificate can be installed on your device so it is trusted. On iOS this step is required if you do not plan to install a certificate authority signed certificate on the server.
It recommended to install a certificate authority signed certificate on the VCOM server. Organizations that generate their own certificates can do so and install the certification on VCOM as they would with any other server. For organizations that do not have this capability, or for VCOM servers that are cloud hosted, the guide below can be followed to generate and install a certificate authority signed certificate.
SSL (CA Certificate)
To generate a CA (Certificate Authority) SSL certificate a domain name must be registered for the server. Additionally, the VCOM Virtual Matrix server must be accessible on the public internet. The steps below show how to generate an SSL certificate using zerossl.com however the steps will be similar for all SSL providers.
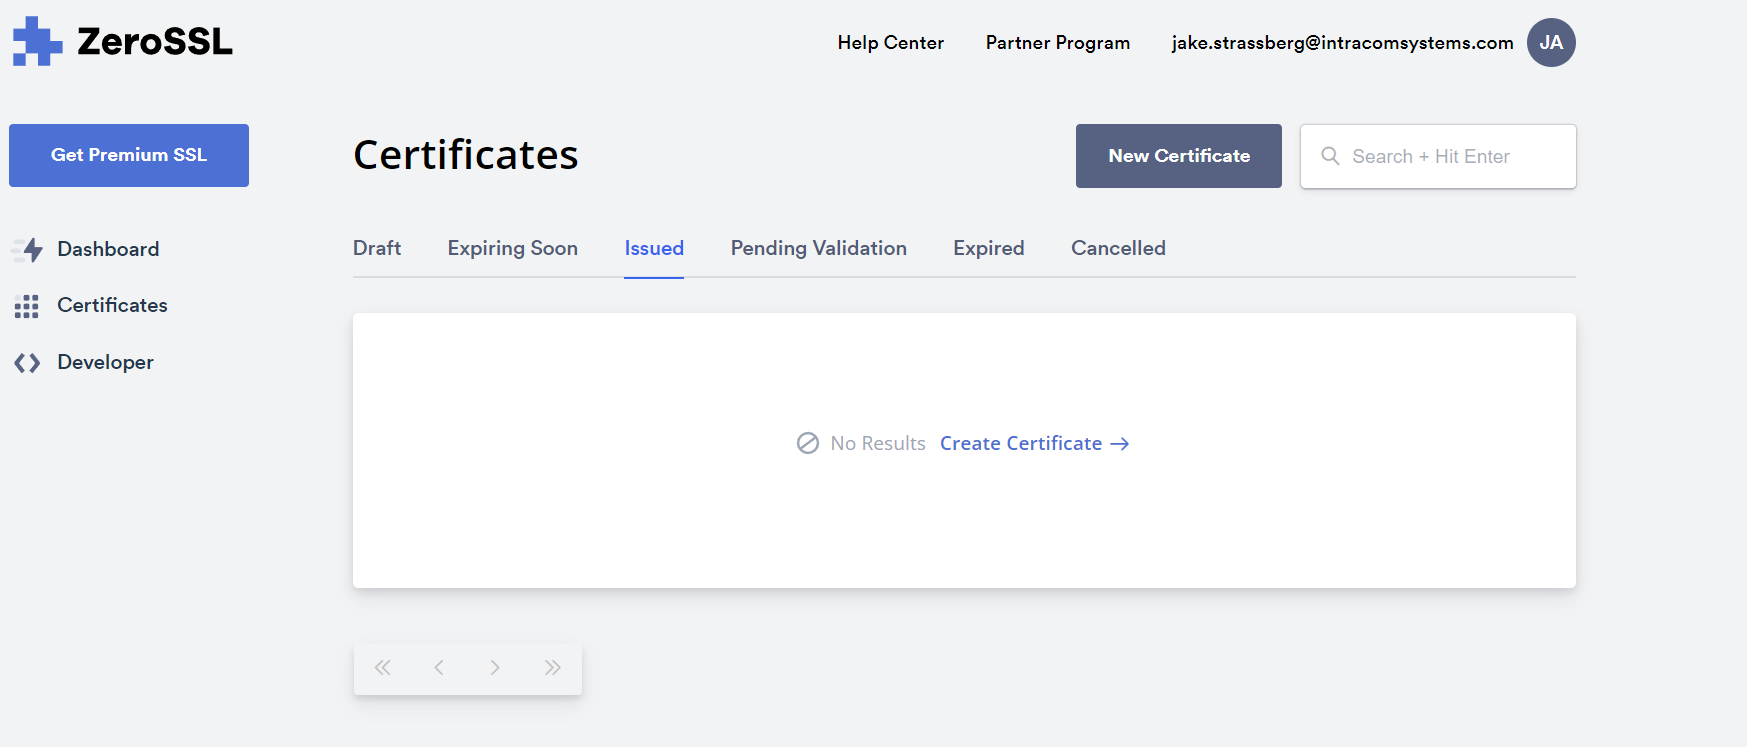
Make an account at zerossl.com then click Create Certificate.
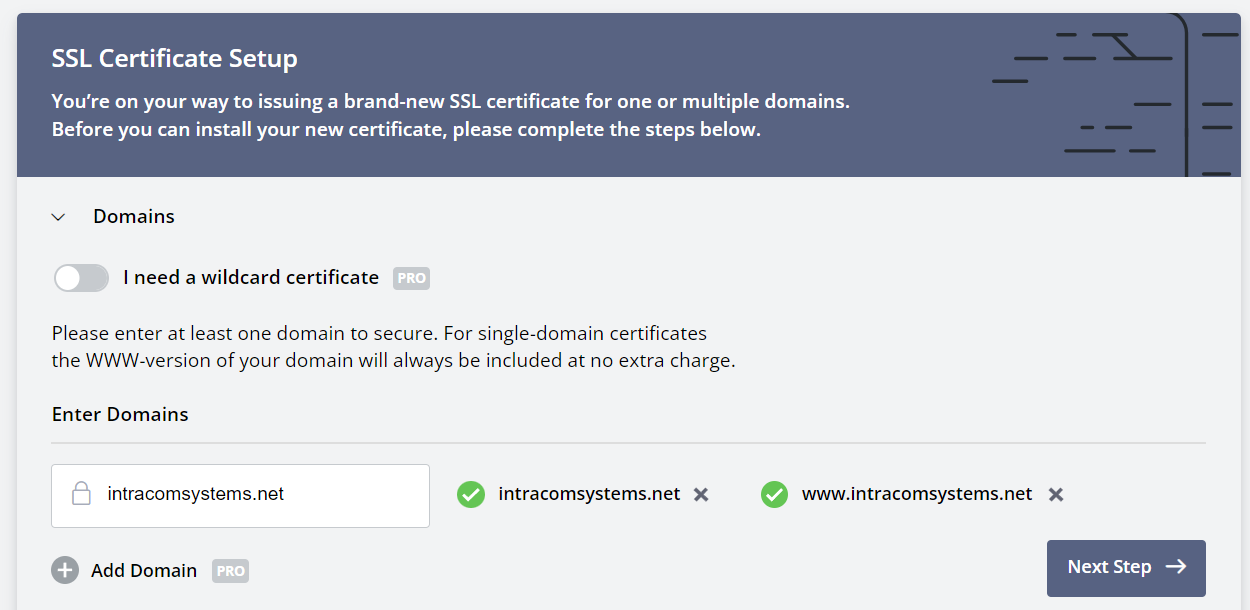
Enter your domain name in the field then click Next Step. Proceed through the prompts.
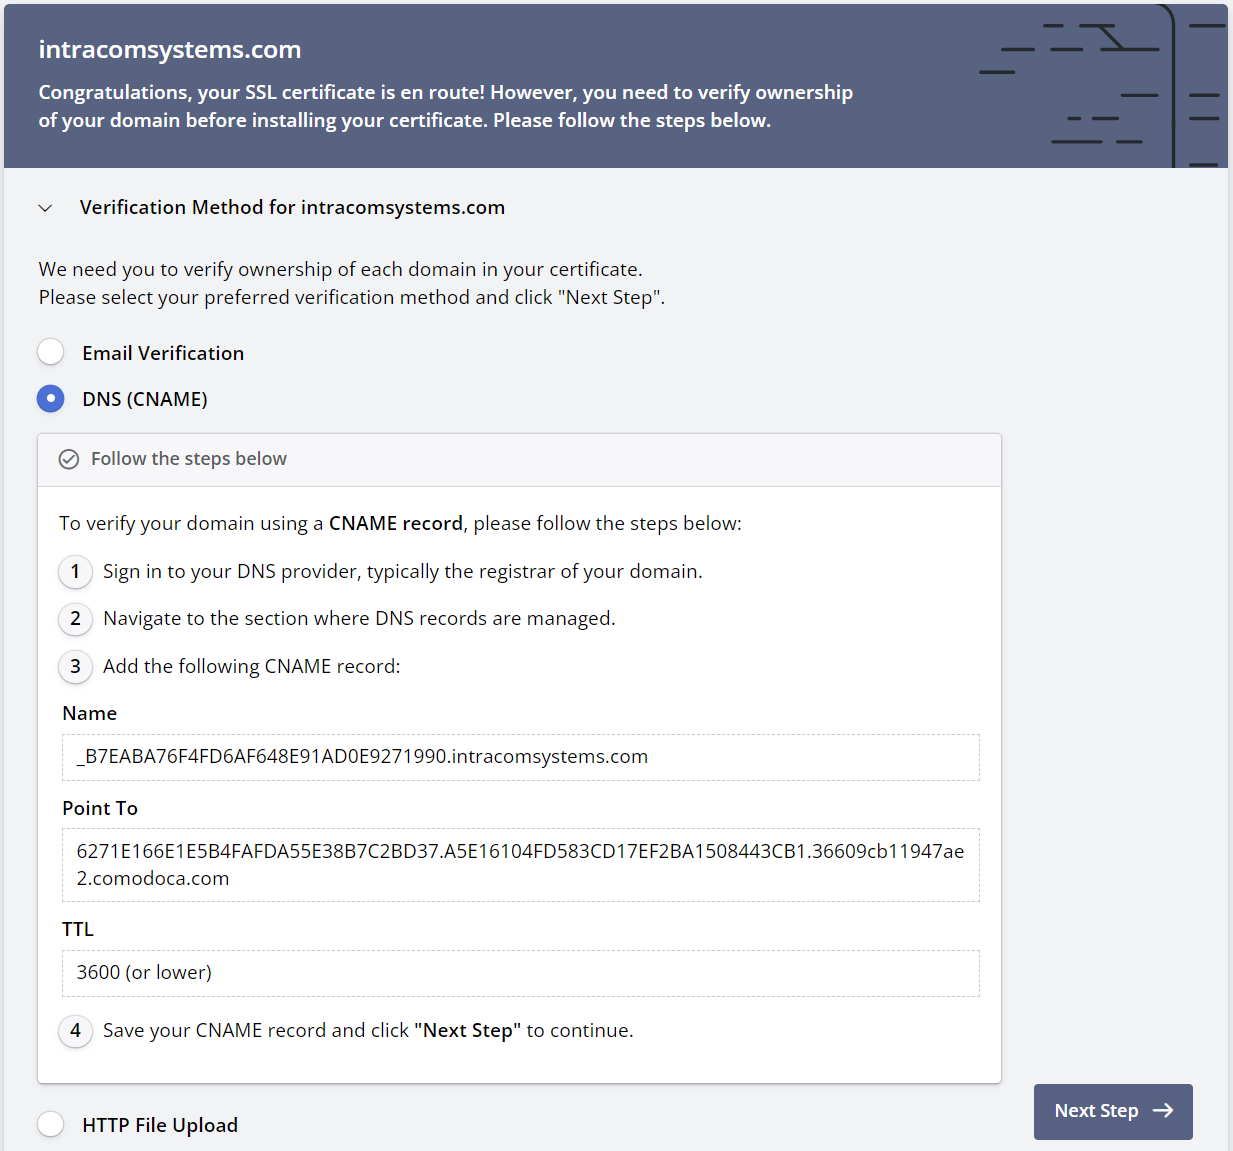
There are a variety of methods that can be used to verify ownership of your domain. For this guide we have chosen the DNS (CNAME) option however any of the methods will work. Follow the instructions to create the necessary DNS records then click the Verify button.
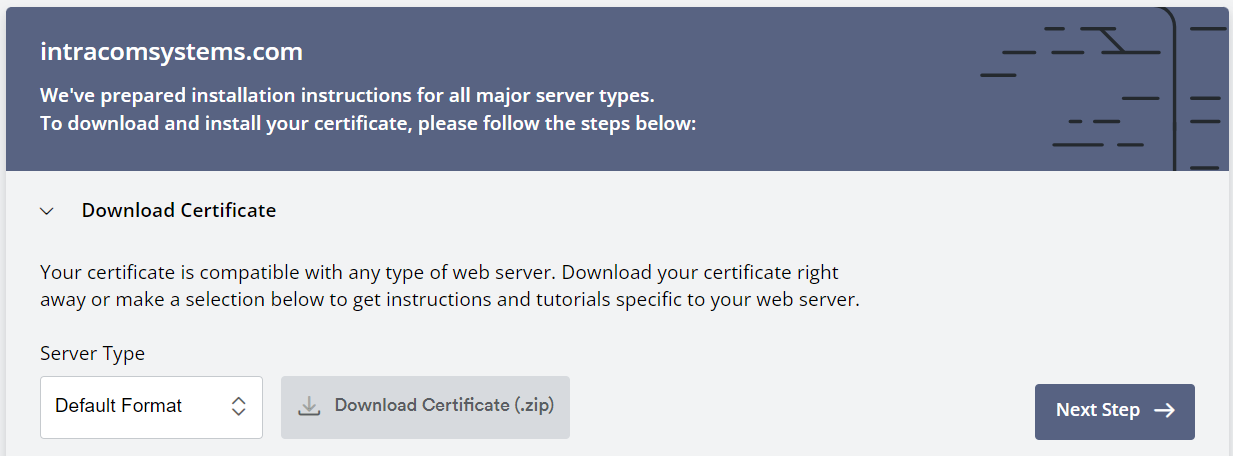
Once the verification process is complete you will be able to download the certificate. Extract the zip and you will have 3 files: ca_bundle.crt, certificate.crt, and private.key. The contents of these files need to be uploaded to VCOM. Log into the System Administration and from the System Maintenance dropdown select Certificate. Click Install Signed Certificate.
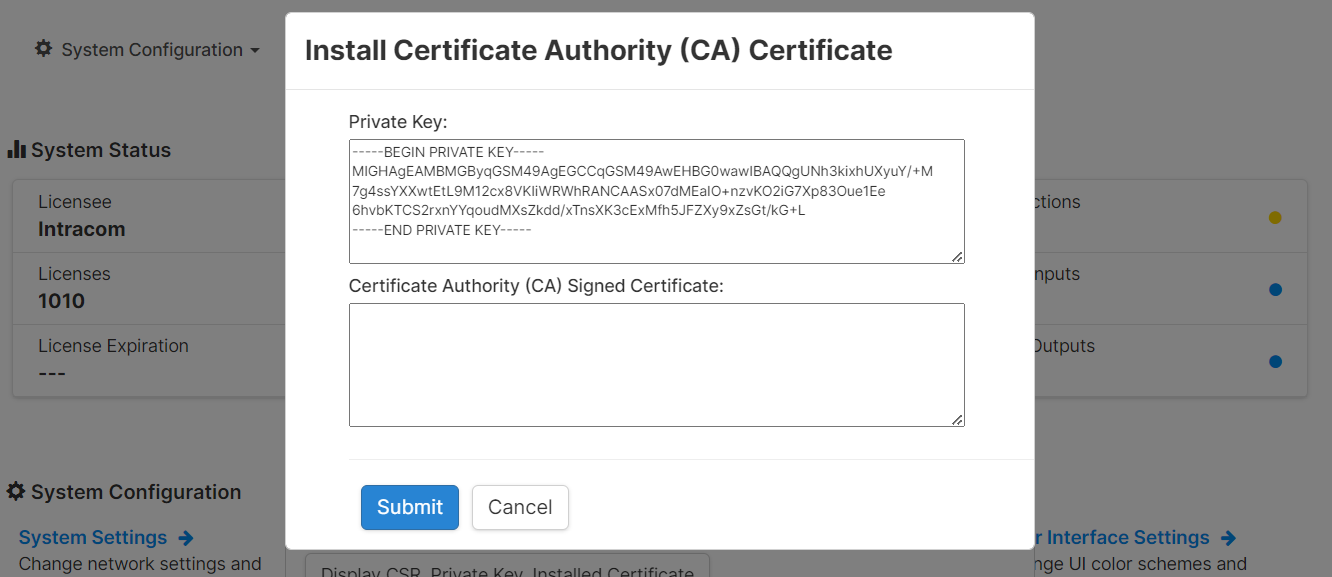
Open the private.key file in a text editor to copy its contents. On Windows, to open the file in notepad you can right-click the file and select Open With > Notepad. Copy the contents of the file and past it into the Private Key field.
Next, copy the contents of the certificate.crt file and paste it into the Certificate Authority (CA) Signed Certificate field.
Lastly, copy the contents of the ca_bundle.crt file and paste it directly below the certificate in the Certificate Authority (CA) Signed Certificate field. Press Submit.
SSL (Self-Signed Certificate)
If you do not wish to generate a certificate authority signed certificate the instructions below can be followed to install the self-signed certificate that comes preinstalled on the VCOM server.
Installing the Self-Signed Certificate on iOS
1. From the WebRTC Control Panel login screen press the button to download the SSL certificate
2. A popup will display with instructions on how to install the certificate on your device
Installing the Self-Signed Certificate on Android
1. Download the certificate
2. Settings app -> Security -> Encryption & Credentials -> Install a Certificate -> Select CA Certificate option
3. Select Install Anyway
4. Select the Intracom Certificate that you downloaded previously