Audio Recording
Two different models of recording are supported in VCOM. The first is file based recording where each endpoint to be recorded is outputted to time a stamped WAV file. The second is based on industry standard SIPREC for interfacing to the third party SIPREC recording platforms. Control Panels, Device Interfaces, SIP connections, and/or Party Lines can be recorded.
File-based Audio Recording
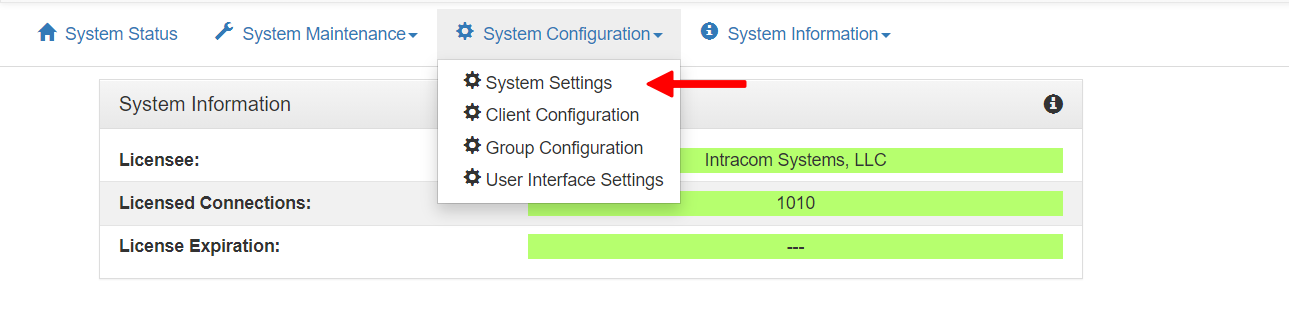
Log into the System Administration and select System Settings from the System Configuration menu.
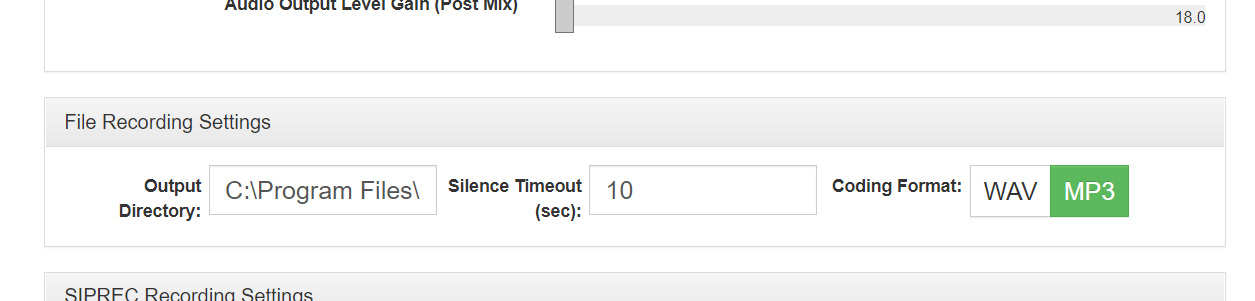
Scroll down to the File Recording Settings section.
Output Directory: The directory in which the audio recordings are stored.
Silence Timeout (sec): The duration after silence is detected on the Client that the system will wait to end the audio recording file. The default is 10 seconds.
Adjust the settings if needed then click the Save button.
Note: The recording functionality must be enabled in the system’s license. You will not see the File Recording Settings if the feature is not licensed.
SIPREC Audio Recording
Log into the System Administration and select System Settings from the System Configuration menu.

Scroll down to the SIPREC Recording Settings section and fill out the requisite fields to allow VCOM Virtual Matrix to connect to your SIPREC server.
Note: The recording functionality must be enabled in the system’s license. You will not see the SIPREC Recording Settings if the feature is not licensed.
Enable Audio Recording
From the System Configuration menu select Client Configuration.
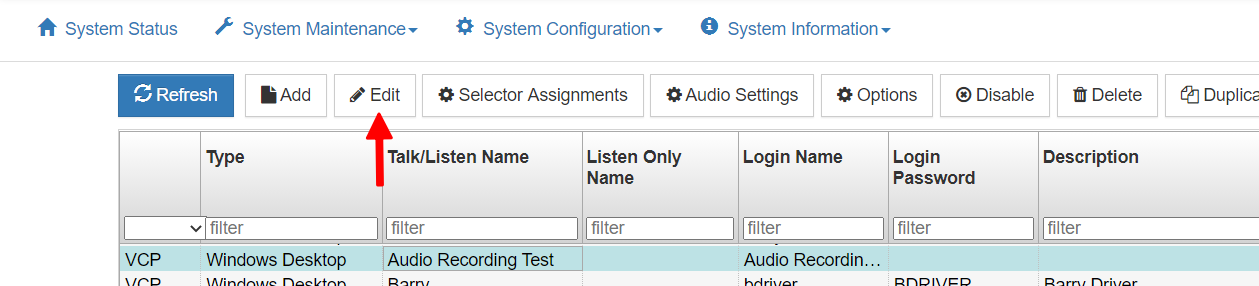
Select the client that you want to enable audio recording for and click the Edit button.
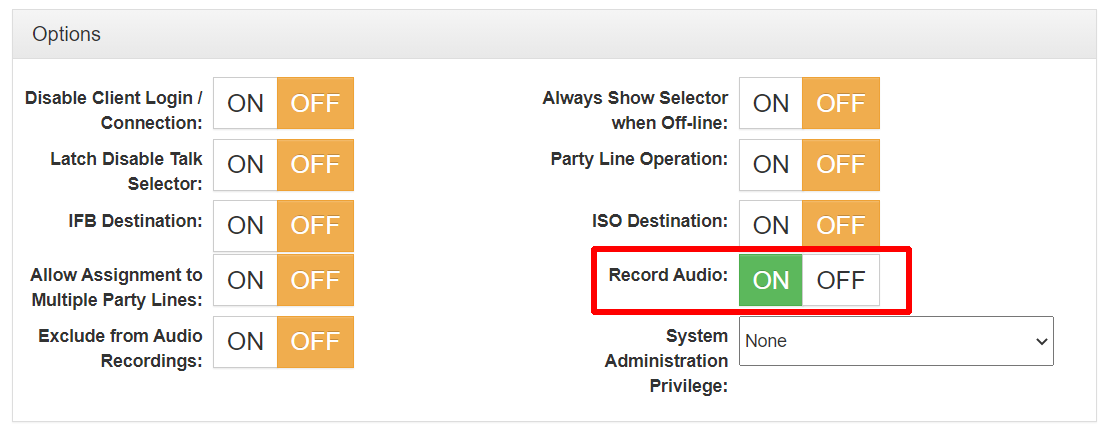
Scroll down to the Options menu and turn on the Record Audio option. Click the save button at the bottom of the menu. All audio going to and coming from the client will be recorded.
Note: The Exclude from Audio Recordings option allows a client to be excluded from recording such as a program feed so that if one is recording a client that is listening to the program feed it will record every else except the program feed.